What to Pack for a Day Hike
")
A list of the items every hiker should carry with them on their day hikes and why. (10 min. read)
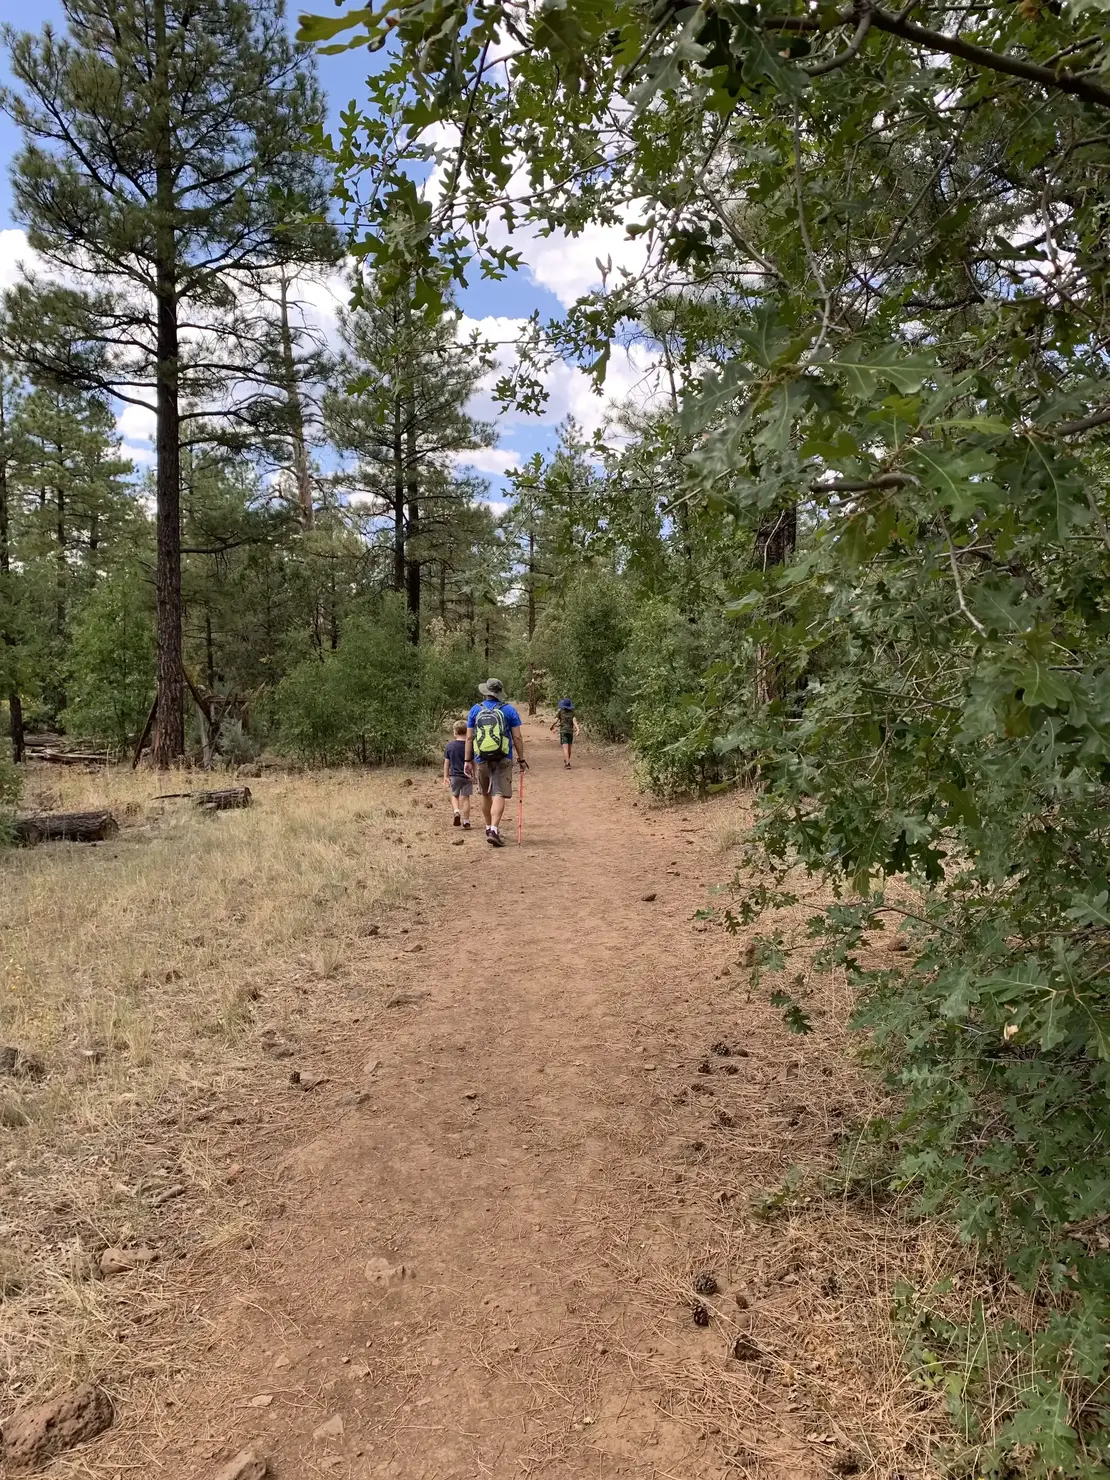
The call of the great outdoors
Many people today live pretty chaotic lives, and in their endeavor to disengage and reduce stress there are several who look to nature to provide the soothing balm to recharge. In many instances, this takes place in the form of day hikes that occur on the weekends and range from a few hours to an entire day of trekking. Regardless of how long your hike is though, for safety reasons, there are a few items that should always be carried with you. Here you will find a list of the items you should always consider having in your pack and the reasons why they are advantageous to have at your disposal.
Packing for the day hike- the list
- Backpack that fits YOU!
- Plenty of water
- Compass or a navigation tool
- Light (Headlamp)
- Sunscreen- face/body and lips
- Insect repellent
- Hat
- Bandana
- Small mirror
- Whistle
- Blister treatment- Moleskin/ New Skin and Band-Aids
- First Aid kit- antibiotic cream, anti-itch cream, surgical tape, gauze, pain meds
- Emergency (solar) blanket
- Knife/ multitool
- Small survival kit
- Duct tape
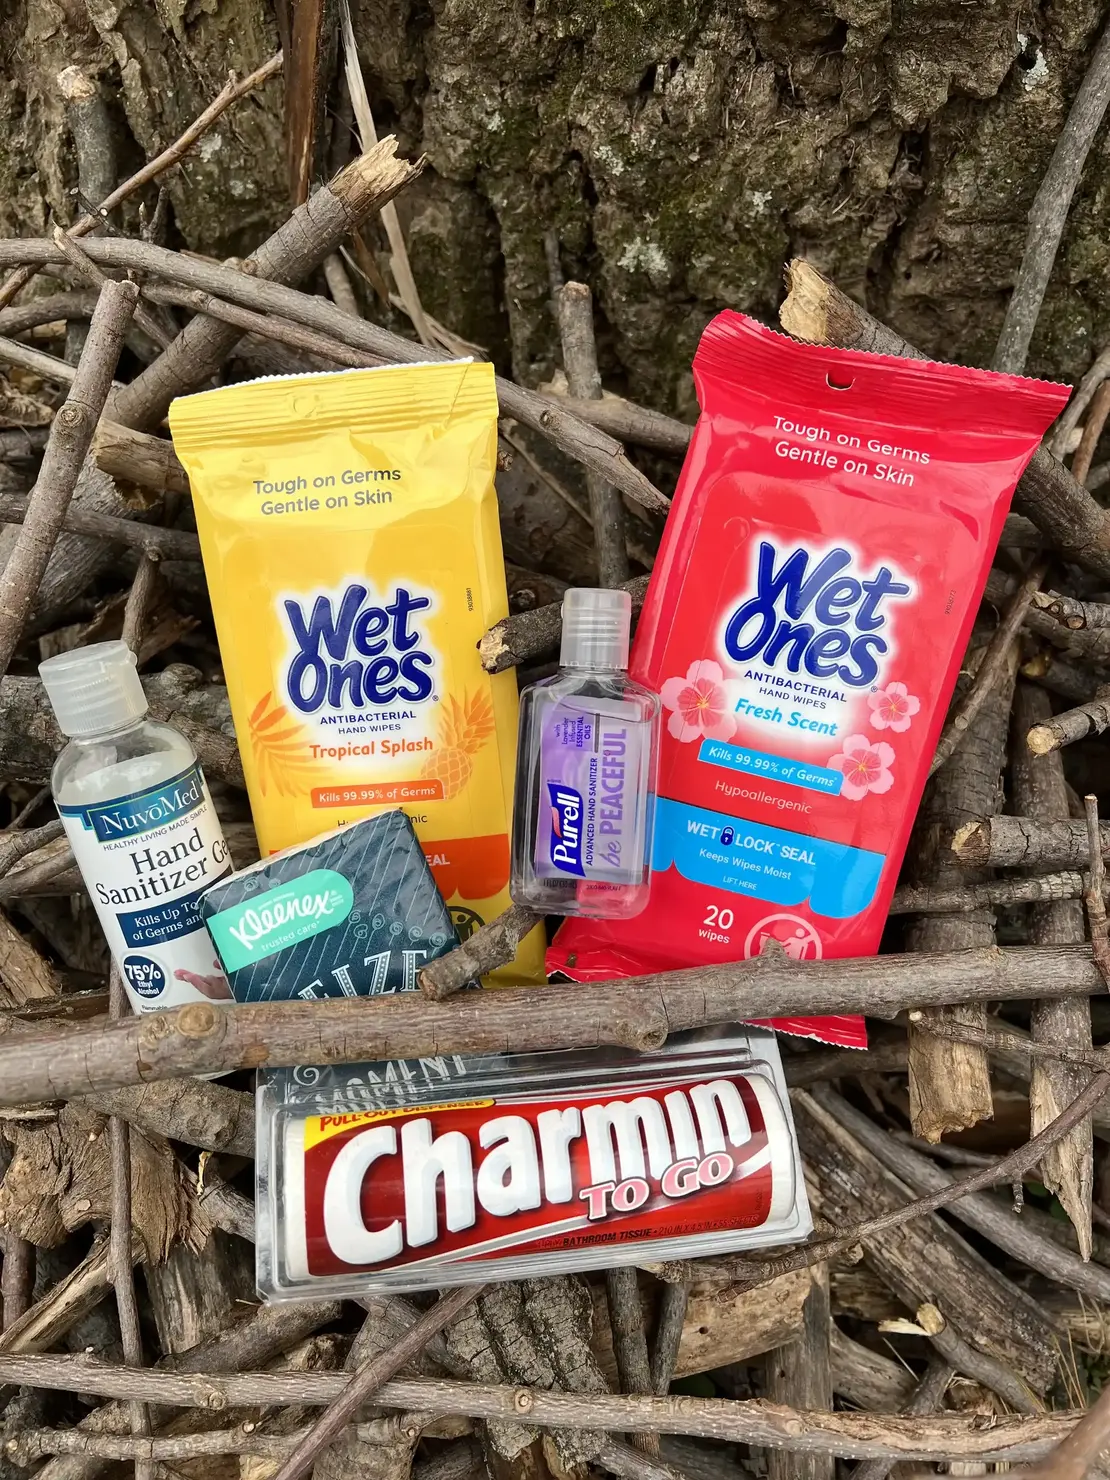
- Wet wipes & hand sanitizer
- Toilet paper and/or tissues
- Rain jacket
- Snacks
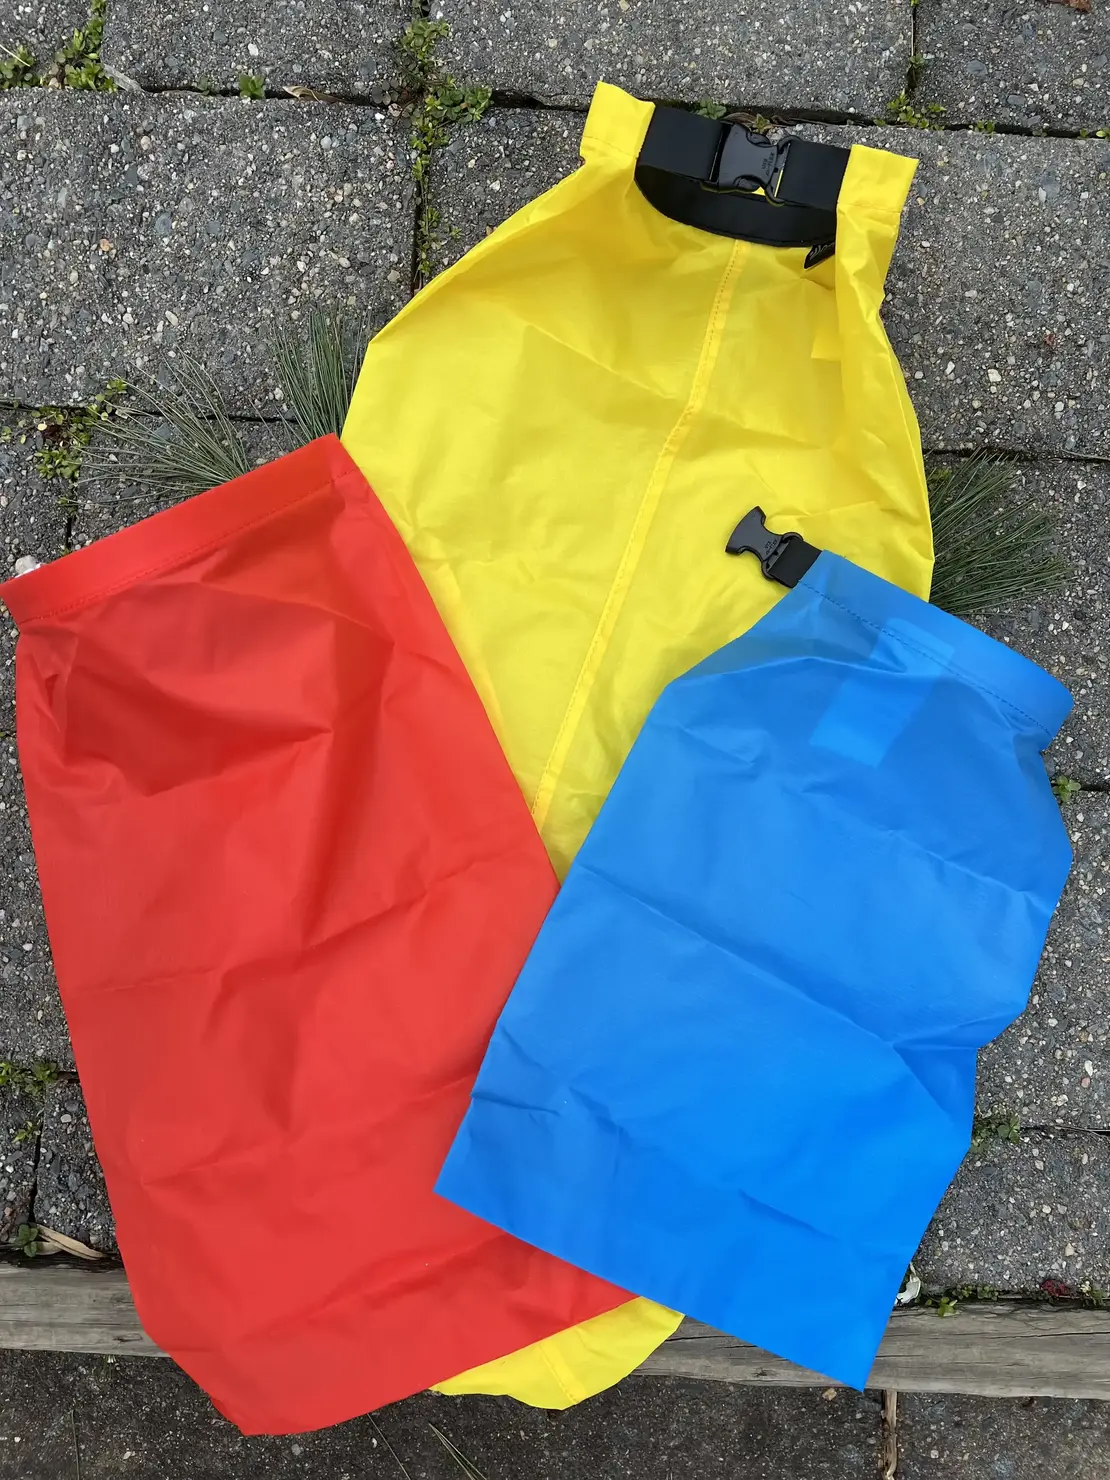
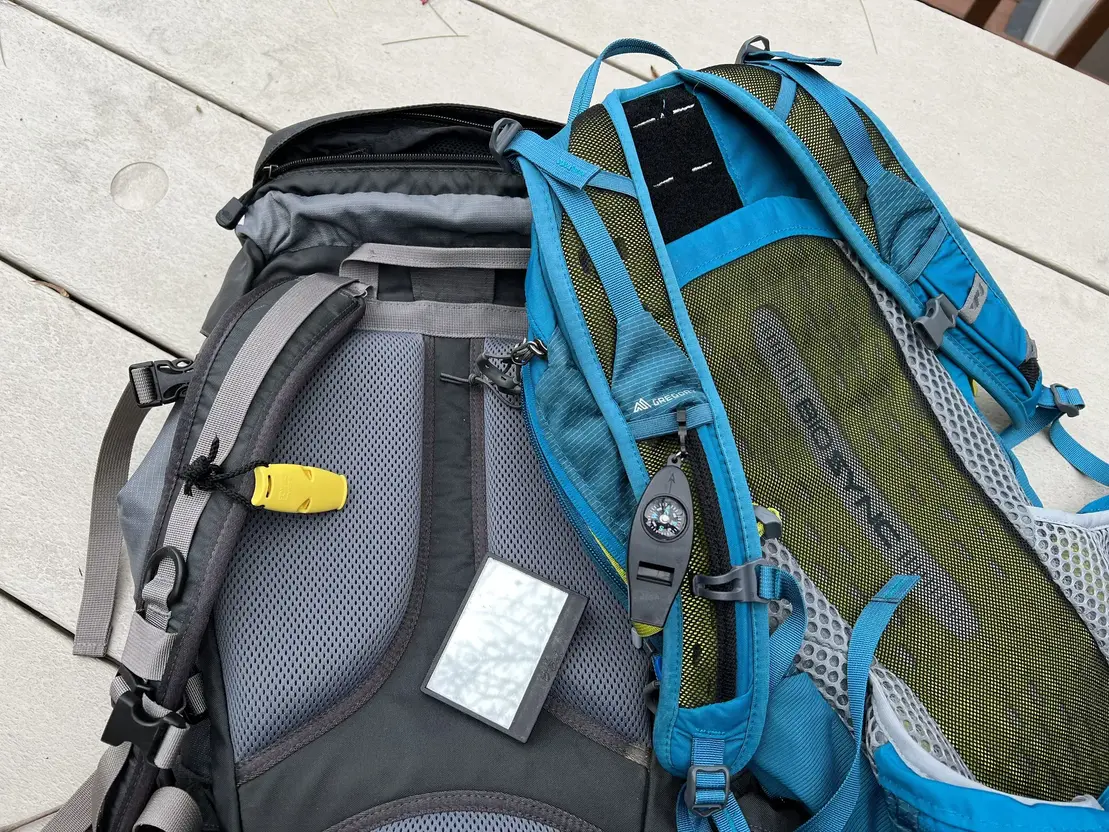
TIP: Lay out all the items you choose to pack, for easy viewing and so you can take stock. Packing small or similar items together in different color small packing cubes or waterproof pouches (like the ones in the picture above) is helpful to both locate items easily and to prevent them from spilling out of your pack when you are quickly retrieving an item. It is extremely frustrating when several small items spill out everywhere, as you attempt to quickly retrieve your rain jacket, because you are suddenly experiencing a downpour.
Wow, that seems like a lot of stuff for a simple day hike!
While the list above does appear really large, the majority of the items are not that heavy and take up little space if packed right, allowing you to still be a lean backpacker but prepared. I have hiked a lot by myself, and now with kids, and most of the items listed here, besides water and snacks, almost always remain in my pack ready to go. The old cliche definitely rings true when out on any hike... "It's better to have it and not need it, than to need it and not have it!"
So why should you pack all this?
Let's start with:
The Backpack
If you are going on a casual walk/hike for a couple of hours and on easy terrain, it may not be a big deal if the pack doesn't fit you well. You should however make sure that it is sturdy and will not fall apart half-way through your hike. This is a concept I belabor and will return to often... Know your gear! if you haven't used that pack in a while and it has been relegated to the back of the closet for years, how do you know the plastic holding the straps together isn't brittle or the zipper is so old that after the first couple of pulls it will not close. Trust me, the zipper or the straps won't break at home but when you are half-way through the trail.
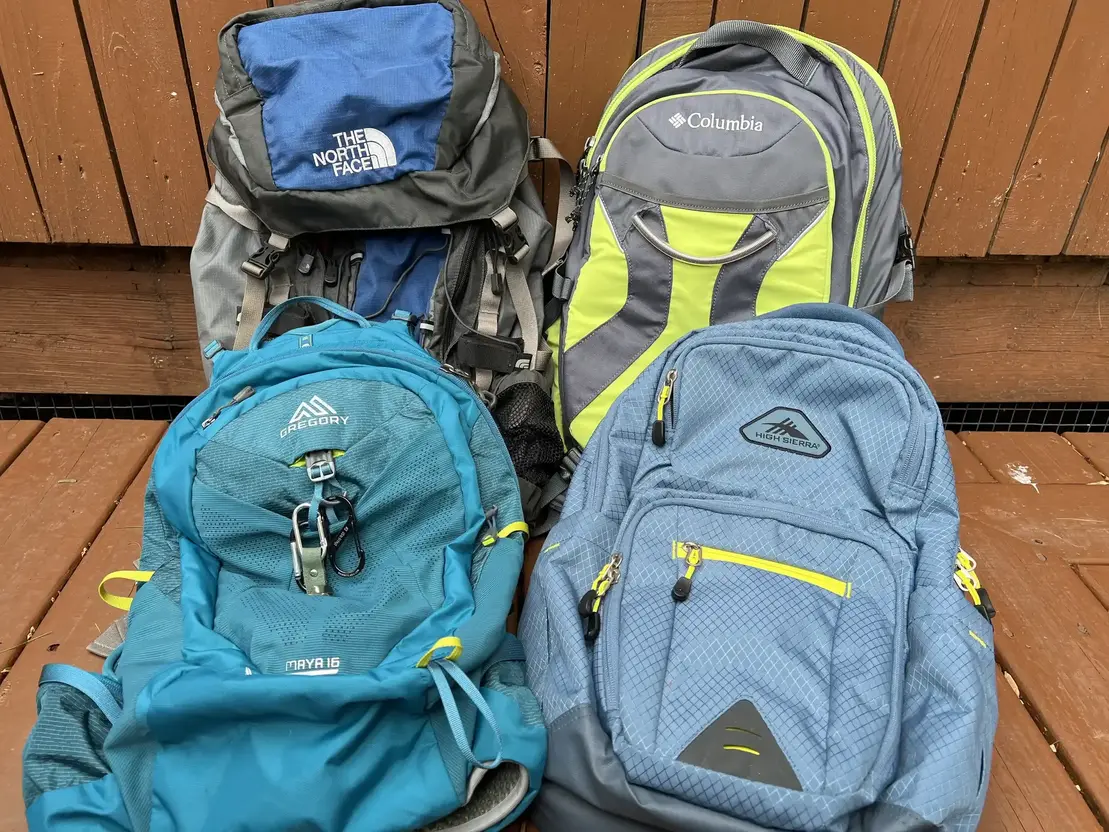
TIP: If you are participating in longer hikes or you find yourself taking them more frequently, investing in a backpack that fits you can be a game changer. A great place to get fitted is REI, if there is one near you. They helped me choose my Gregory Maya pack that is my go-to backpack for day hikes.
Plenty of Water!
This is always the bulk of the weight in my pack. The general rule for how much water you should take with you on a hike is as follows:
- Adults: 2 cups (about 1/2 liter) of water for every 1 hour of hiking
- Children: 1-2 cups of water for every hour of hiking
There are several other factors however, that you should also consider like: How much water do you drink regularly, is the terrain steep or hilly, and is the weather projected to be warm or cold. If you normally drink a lot of water, you will obviously need to account for that, as you will be actively walking provoking more thirst. If the terrain is challenging, this too will cause you to consume more water. Lastly, we all know we drink more water on days that are hotter. If all these factors are present, you should increase the amount of water you bring along with you to at least 4 cups (about 1 liter) for every hour per person. If you aren't sure how much water you will need, it is best to bring twice the amount needed just in case. Once you become familiar with your consumption rate you can adjust accordingly.
TIP: Take small sips as you go if possible. This will help keep you from getting dehydrated. Once you actually feel thirsty you are already dehydrated.
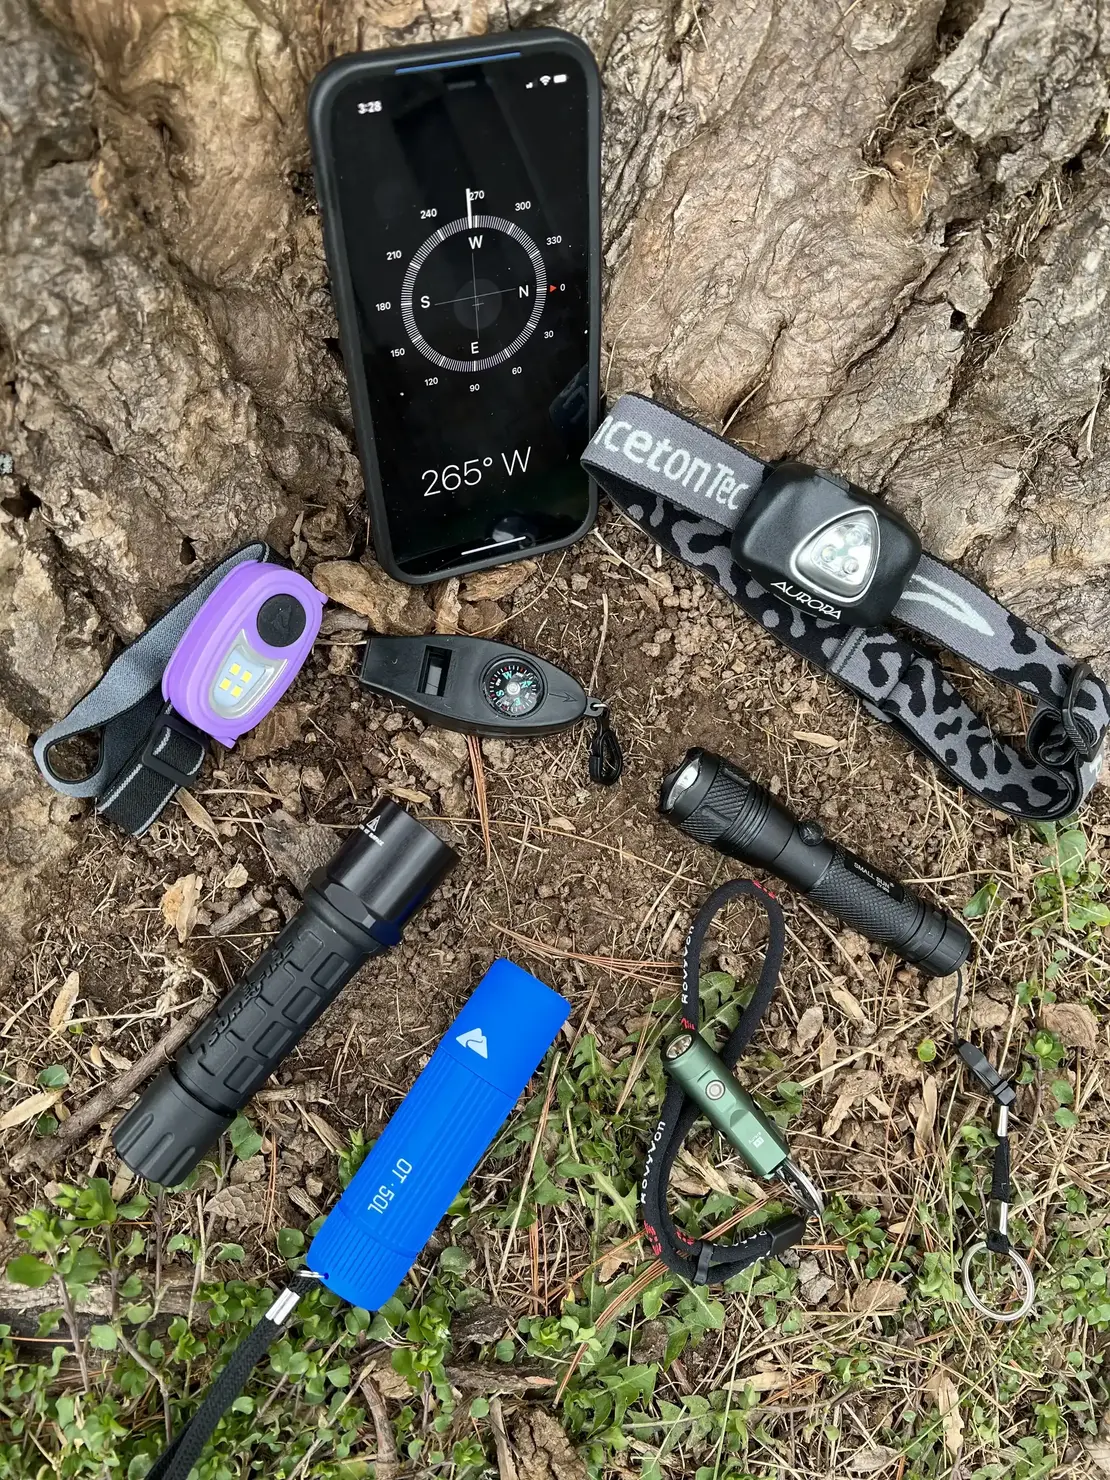
A Compass or Navigation Tool
A small compass is a great tool to know how to use and to have even if the trails are clearly marked. Most phones now have a compass on them as well, but if you are truly lost, what happens if your phone dies? If you hike with children, teaching them how to use a compass is good idea as well. It is usually a fun exercise for them and could be helpful someday.
A Light
Having an extra light is always helpful. Once again, your phone has a light but depending on your circumstances using the remaining power on your phone might be better served elsewhere. So being prepared with a small light of some kind is incredibly helpful. I always have a headlamp because it allows me to keep my hands free. The ones available now are small and produce a lot of light, and many come equipped with multiple modes of brightness, blinking, and even a red light to help protect your night vision. I have one that I took with me on the multiple day hike of the Inca Trail to Machu Picchu, where the direction of the beam is adjustable, which was helpful to see what was directly below me and not just out in front of me in the distance. I have even purchased some inexpensive ones for my kids, and they think they are great. If a headlamp is not for you, then consider a small micro mini flashlight with a carabiner that can be attached to the outside or placed inside the pack.
TIP: Not only will the light help you see, but in an emergency, it can also be waved around or used so others can see you.
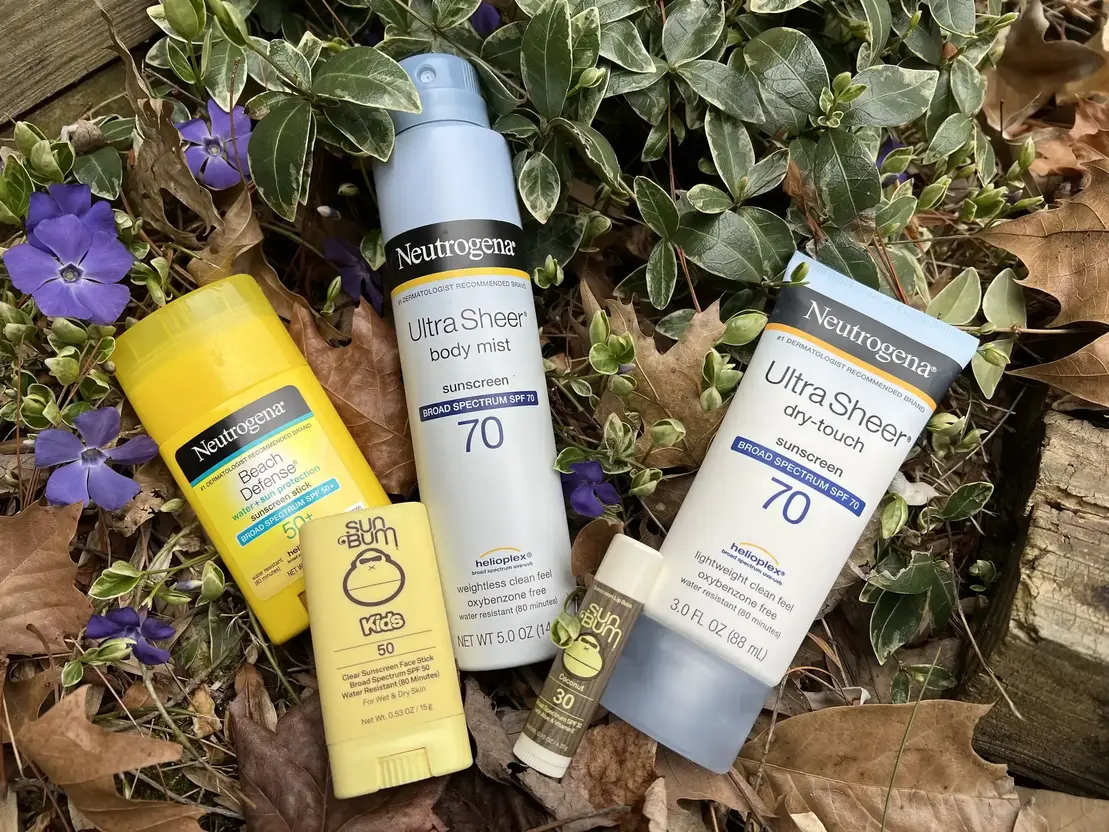
Sunscreen
Whether you are hiking in the heat or the cold, you are always being exposed to UVA and UVB rays. Be sure to have plenty of sunscreen, for your lips and your face/body with you. I love the convenience of spray sunscreen and use it on a regular basis on myself and my kids, but I do not usually take it in my pack. One, it takes up a lot of space, and two, if it blows back in your face, it can really make for a bad experience if it gets into your eyes. If this happens at home or when you are out and about town, you can head to the bathroom or a sink and get some water to wash it out. However, if you are on a trail water is a precious commodity and might be limited to only what you are carrying with you.
TIP: I like the Neutrogena Beach Defense sunscreen stick because it is easy to apply to my face, and because it stays in place and seeps in quickly. I prefer the Ultra Sheer Dry Touch sunscreen in a tube for my arms and legs because it is weightless, and I don't know it's there. The kids really like Sun Bum products, especially the sunscreen lip balms.
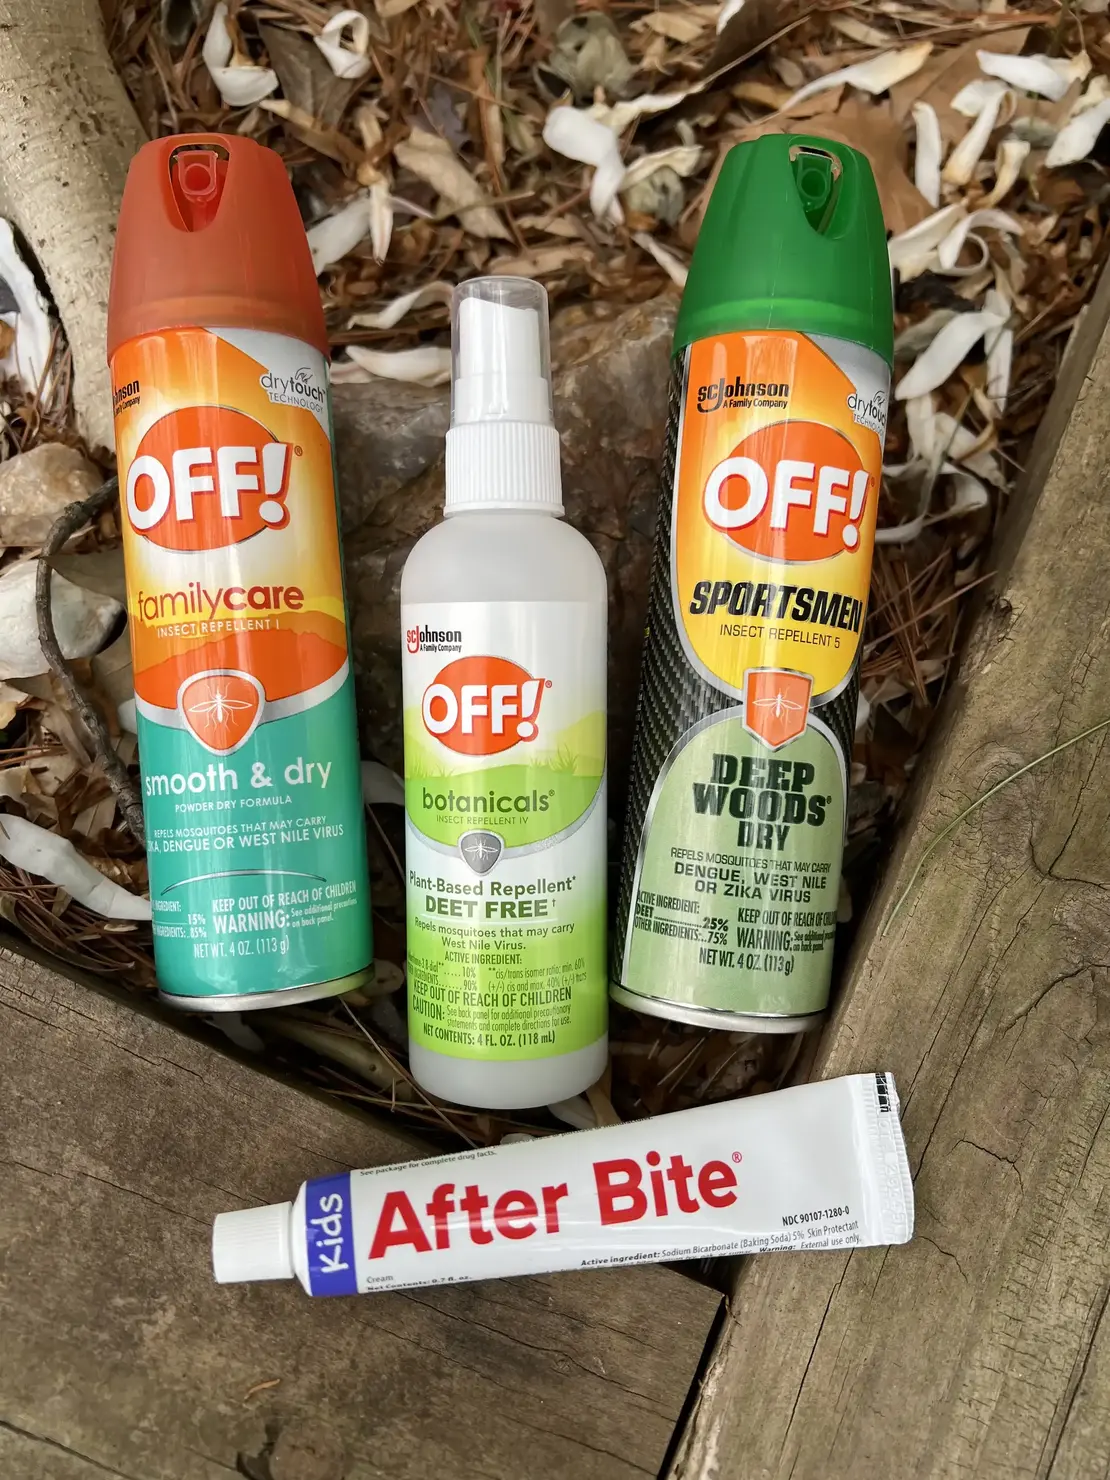
Insect Repellent
Depending on where you are hiking the "bugs" can be a non-existent or a nightmare. I have hiked in both environments and was so glad I had it when I needed it. Hiking in some areas requires having repellent that will not only keep away mosquitos and gnats, but also deters ticks and chiggers from making you their next meal. Getting severely mauled by bugs is not something I wish to experience during my hike or afterwards. I have used both Cutter and OFF brands and found they both work.
TIP: If you have time (which is not always the case) and know you will encounter bugs, take your clothes, and those of whoever is hiking with you, and place them in a garbage bag. Spray the bug repellent in the bag, with the clothes, and seal or tie the bag closed as tightly as possible. This will help the bug spray permeate the clothes and will hopefully require you to spray less on your skin throughout the hike. I have been doing this since I was in the military, and unless the bugs were severe, I found I sprayed less bug repellent directly on my skin.
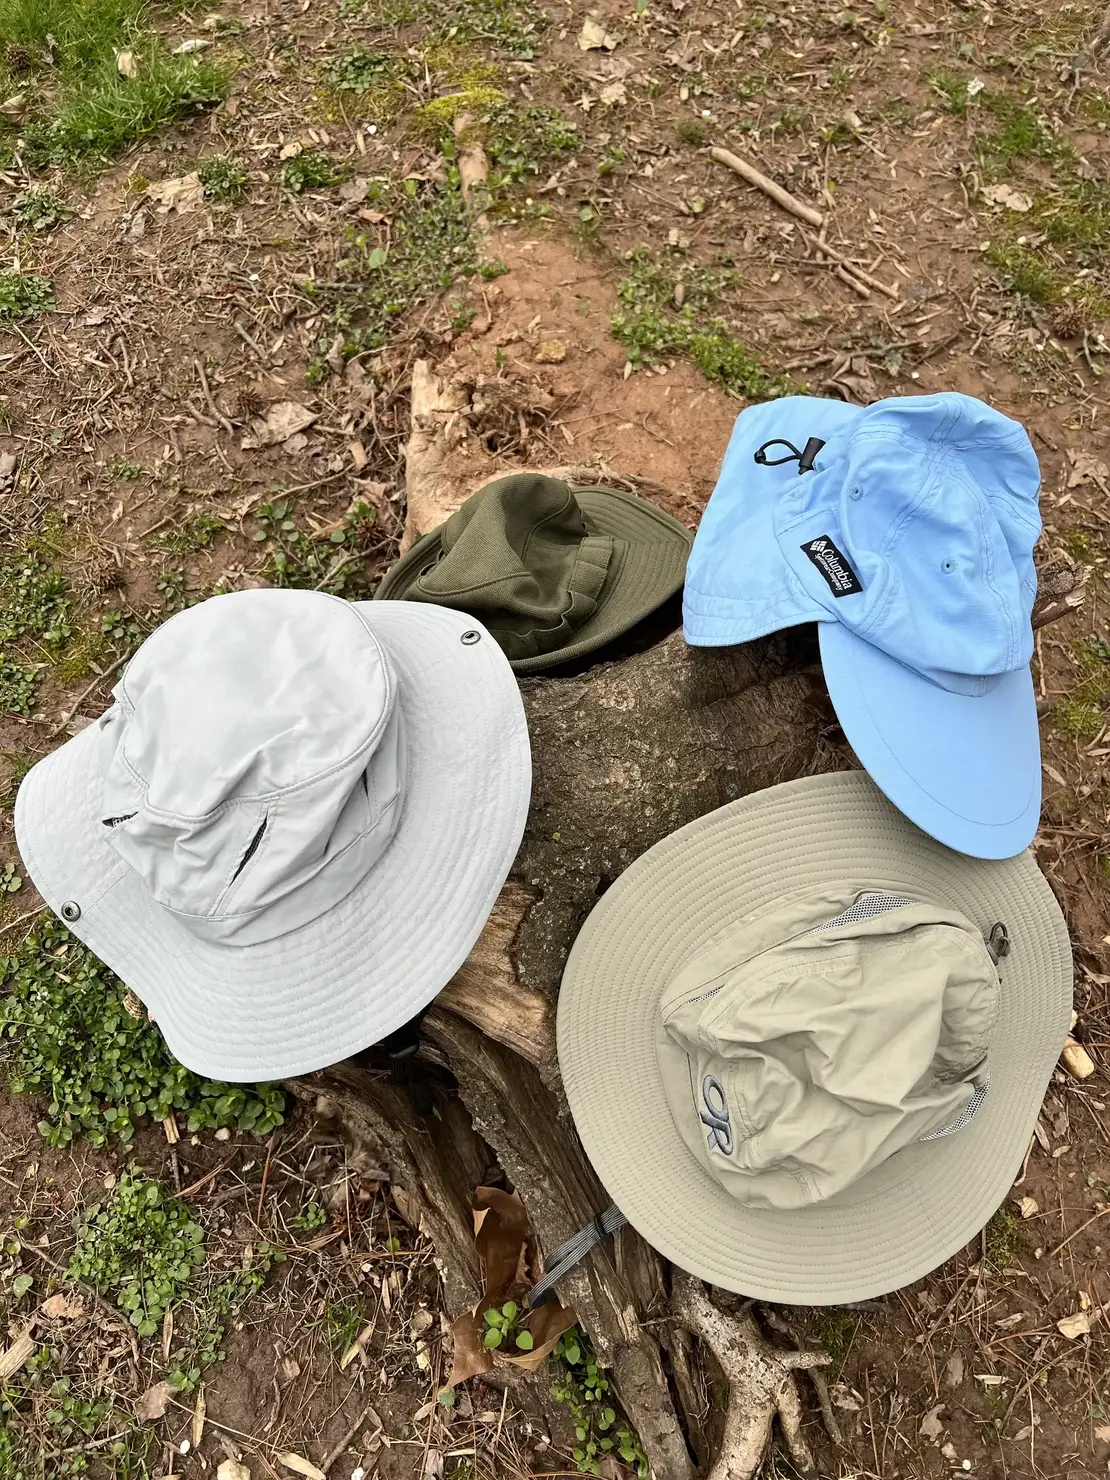
A Hat
A good hat is a must during hikes. I highly recommend a large, brimmed hat that will not only protect your face, but your neck as well. It also should have a means to secure the hat to you, either via a neck strap or a clip allowing you to attach it to your shirt. You never know when you will encounter some high winds, and being able to secure your hat, so it doesn't fly in the middle of your hike, is important.
TIP: Getting a hat that is ventilated or light and breathable is a good idea. It allows the heat of your head to escape during the summer, and in the winter, you can place a buff on your head, under the hat, to add an additional layer of insulation if needed in the cold.

A Bandana
This is one of the most versatile items I carry with me in my pack. In fact, I carry one with me everywhere practically, including my purse. A bandana has SO many uses and is incredibly lightweight and compact. This is another item I have been carrying with me since my military days and here just a few of its uses:
- A sling
- To cover a wound
- To carry items around
- As a neck scarf or to cover your mouth
- As a head scarf to protect from the sun
- A washcloth to clean your face
- A cloth to clean other items
- A strap
- In place of a rope
- To tie around something as a marker
- A makeshift tourniquet
TIP: A bandana and a round metal key ring can make a useful improvised tourniquet in an emergency. I always keep two metal key rings, on every bandana, to use as the securing mechanism for a windlass on a makeshift tourniquet.
A Small Mirror
No, this is not to make sure I look stunning on the hike, but rather to use as a signaling device in an emergency. The light reflecting off a mirror can travel for long distances and is highly visible if you should ever need to be located or rescued. There are so many kinds available on the market, so choose the one you think is best for you.
TIP: Choose a high-quality mirror that will last. Ones that are made of plexiglass with a shiny backing usually don't stand up to any sort of use or the elements. Look for one that is made of military grade stainless steel, that can take a beating but will still perform when needed. Some even have instructions on how to use the signaling mirror on the back, because the last thing you want is more stress from not remembering how to use the mirror while being lost or injured.
A Whistle
Today, many hiking packs have a whistle integrated into the clip mechanism on the chest strap. However, not all packs have this feature, so having a reliable weather resistant whistle is a must. In case of an emergency the sound of a whistle is louder and travels farther that a human voice calling for help. It also requires less energy to blow a whistle in the event you or someone else is hurt. The universally recognized whistle codes are: One blast: “Where are you?”, Two blasts: “Come to me.”, Three blasts: “I need help.” Be sure to evenly space your blasts to communicate clearly, and to pause after each series of whistle blasts to listen for a response. If there is a possibility you could become separated, making sure everyone has a whistle can be helpful in locating each other.
TIP: Make sure the whistle is attached somewhere near your mouth, either on the shoulder straps of your pack or attached to your clothing. The whistle is useless if you cannot get it to your mouth in the event of an emergency.
Blister Treatment
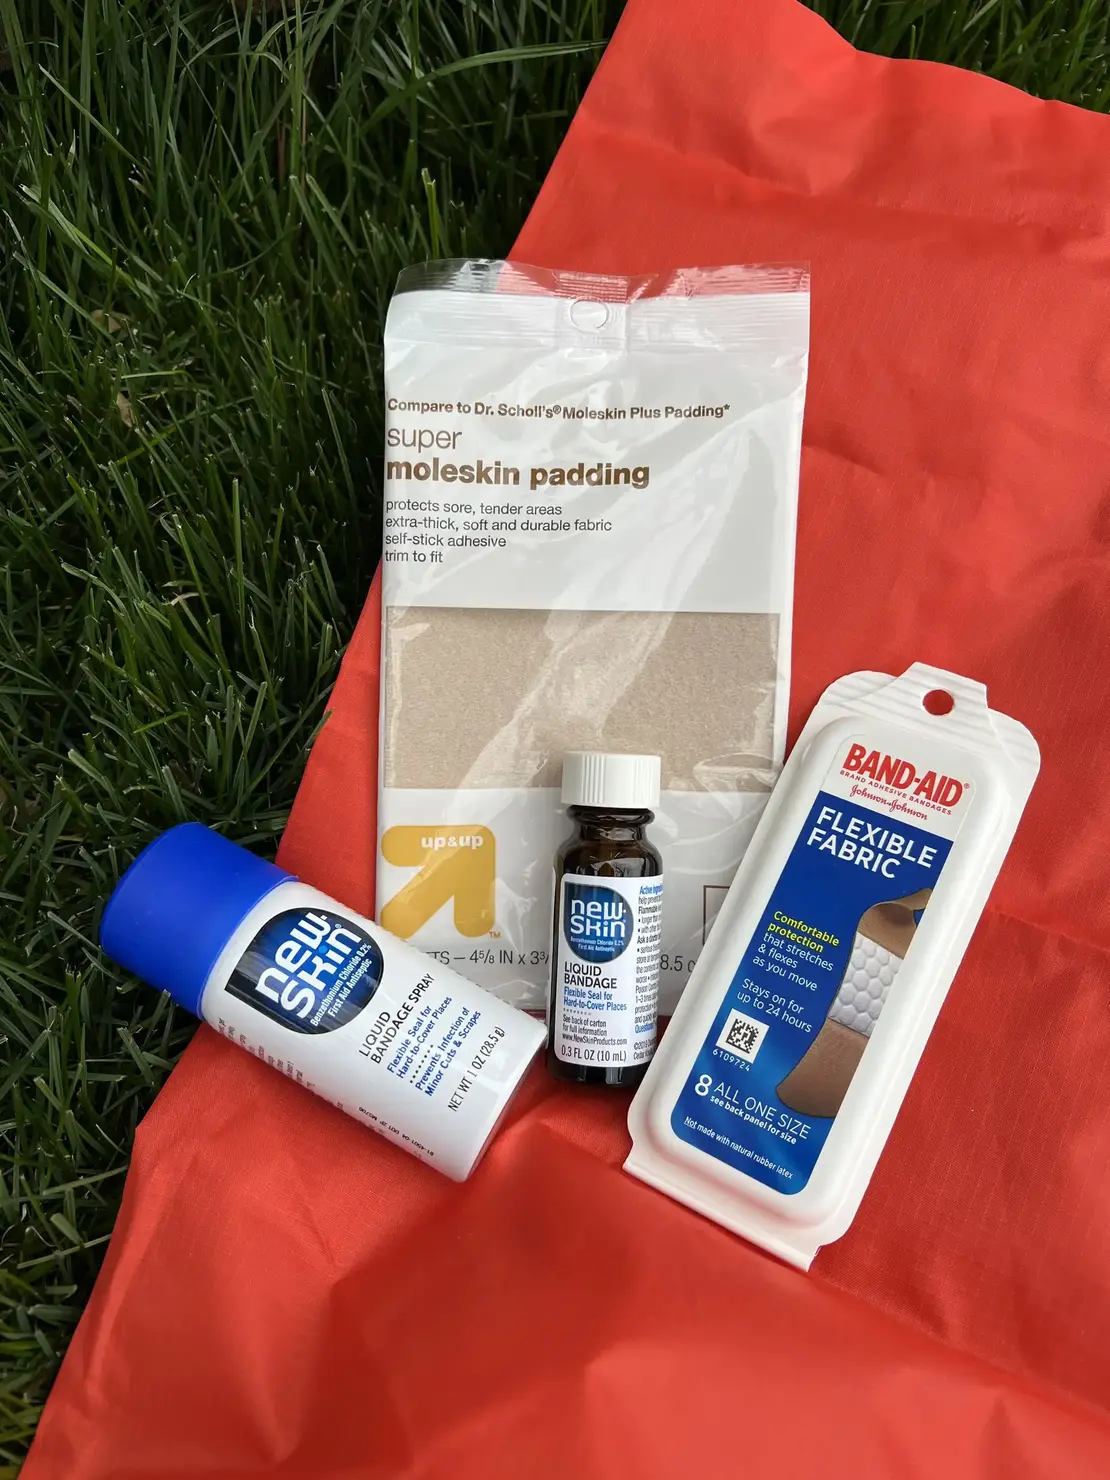
We've all been there. We feel the beginnings of a "hot spot" on our feet or in an area where something is continuously rubbing or chaffing your skin. When you dare to look, you confirm the worst... you have a blister. Blisters can definitely be a pain during a hike, and having some form of treatment can help ease some of the discomfort, so you can make it to your final destination. I usually carry some form of moleskin or New Skin to help provide a protective barrier that will hold me over until I get off the trail.
TIP: To avoid getting blisters make sure your hiking boots/shoes are broken in. Wear them around in short intervals after you purchase them, to give them time to mold to your feet, or for you to realize you may have purchased the wrong boots. Believe me it happens; hence the reason several reputable outdoor gear stores allow you to test them out and return them if they don't work. Also, make sure to change your socks on longer hikes (so be sure to carry an extra pair in your pack), and stop to give your feet a chance to air out if you have naturally sweaty feet. This should help immensely with decreasing the chance of getting blisters.
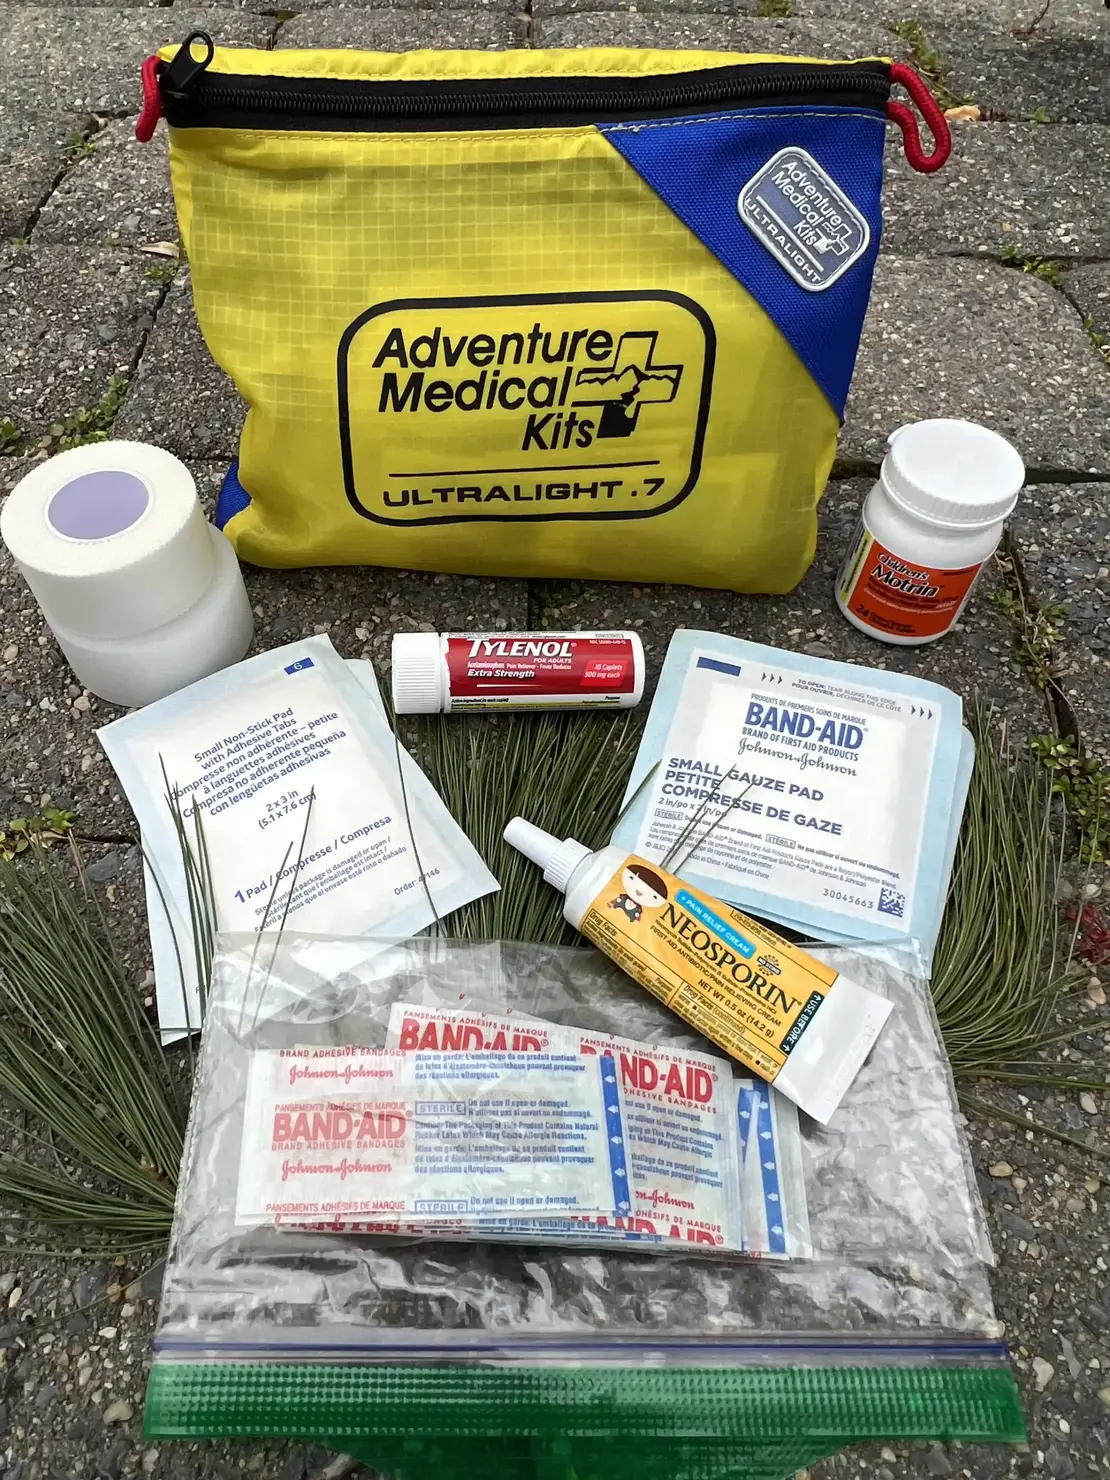
A First Aid Kit
There are so many variations of first aid kits on the market that I have heard people say it can be difficult to decide which one to choose. Purchasing one with a colorful compact case is nice because it is easy to find in your pack and will most likely have the simple supplies you need when you first purchase it. However, you can also just purchase the items you want to carry and place them in a Ziplock bag. The main items you should carry with you are:
- Antiseptic ointment like Neosporin
- Band-Aids
- Surgical tape
- Gauze
- Anti-itch cream like Benadryl or Cortizone 10
- Alcohol or cleansing pads
- Pain reliever
- EpiPen if needed
TIP: Make sure you look at what is actually in your med kit, especially if you just purchased it, and then occasionally inventory the contents to keep it up to date. Once again... know your gear! Items like the antiseptic ointment and the anti-itch creams have an expiration date so replace them as needed. Also, field prepping certain items, like plastic wrapped and sealed gauze, that can be hard to get into (by cutting the package open slightly and putting a tabbed piece of surgical tape on it for easy tearing), can be a good idea so they are easy to get into if you need to provide first aid treatment in a hurry or to yourself. Should you need to treat a wound that is bleeding, it can be difficult and slippery to open the gauze in plastic packs if not prepped.
An Emergency (Solar) Blanket
Emergency blankets, also known as solar or mylar rescue blankets, are another versatile tool that I always take in my pack. They are extremely lightweight, usually come individually wrapped, and are fairly inexpensive. To be most effective the blanket should be placed with the shiny side toward the body or anything you are looking to keep warm. The shiny side will reflect about 90% of your body heat, while the dull looking side will only reflect about 65% of the heat. It is important to remember that people lose the ability regulate their body temperature when they are injured or in shock, even in warm weather, so putting one of these blankets around them as soon as possible is important. While these blankets are designed to keep you warm, they are not just for use to stave of the cold or hypothermia. Here are a few additional uses for the emergency blanket:
- Signaling and for increased visibility because they are just like a giant mirror.
- A funnel to catch rainwater, or a container to hold snow that you can melt to drink by using the sun
- A lean-to shelter half
- Reflecting the heat of a fire
- Cooking- like a baked potato, but only place it near the fire not directly in or on the fire or it will melt
- To waterproof anything or act as a rain poncho
- Cutting it into strips to tie on a splint
- Tying strips on a tree as markers or signals
TIP: I normally carry at least two of these with me because they are so useful. This way I can place one around my body and one on the ground to sit or lay on. By placing the one on the ground I am not absorbing any cold or moisture from it, and I am trapping and reflecting back as much of my own body heat as possible. Having at least two can also come in handy should you encounter a taller person who needs first aid or multiple people.
Knife/ Multitool
Another extremely useful device is a knife or a multitool. On day hikes I tend to just carry a knife because the multitool adds more weight. You never know when you might need to cut something, like say the solar blanket listed above to make ties to secure a makeshift splint or mark the route you are taking.
TIP: I normally carry two knives with me- a small light one that is clipped by a small carabiner at the top or the side of my pack and easily accessible, and a bigger one down in my pack. This makes it easy to reach if I need it quickly and I don't have to dig all through my pack.
Small Survival Kit
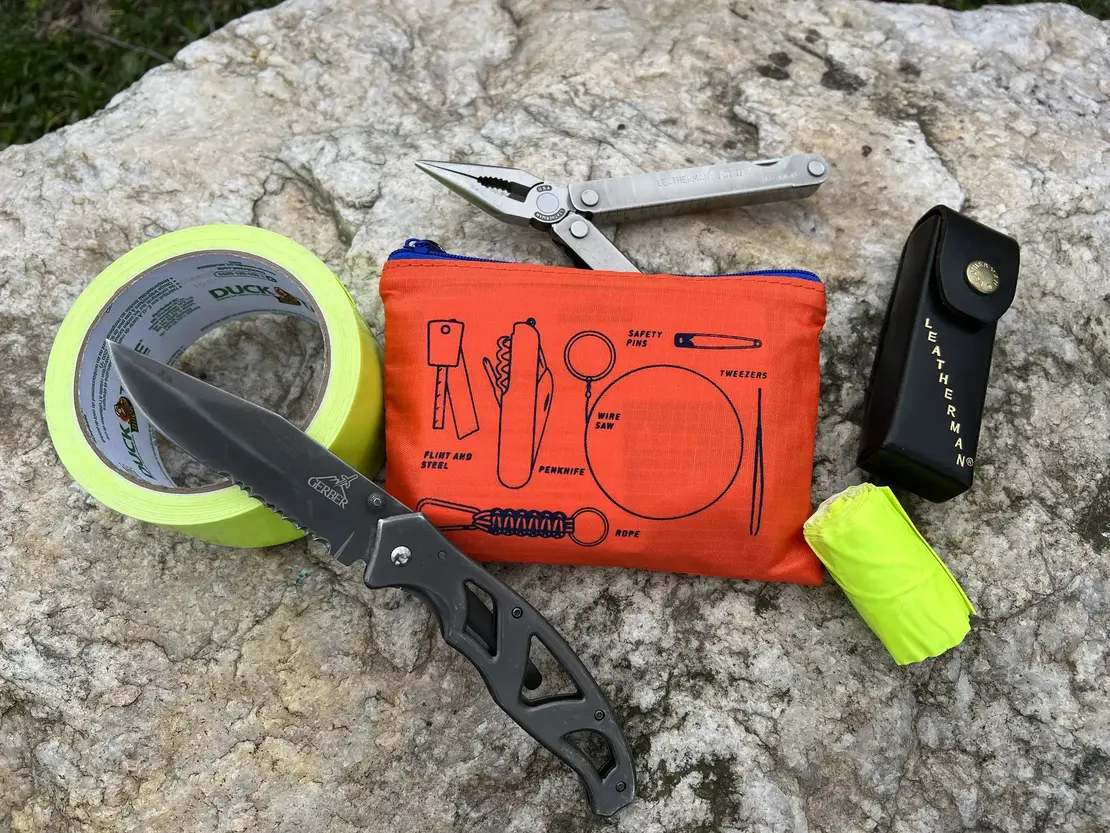
When people set out on a day hike the intention is to return home before the end of the day. What happens though if one of you is hurt and unable to get back before dark? This is where the small survival kit can pay big dividends. There are several on the market that come pre-packaged, like the one pictured above in the small orange pouch. I carry this one with me all the time, in the event something happens, and we need to shelter in place for a bit.
TIP: I am not always a fan of pre-packaged gear sets, but I have seen several small survival kits that are well put together, have a small form factor, and contain items that cannot be purchased separately. The one I carry has a very small wire saw that is incredibly sharp but also incredibly thin and sturdy. That was actually the main reason I purchased this kit, as I already had the rest of the items in another homemade kit. Keep an eye out for small survival kits like this one around the holidays as they seem to be more available and make great small gifts for the hiker(s) in your family.
Duct Tape
Ah...Duct tape, the universal temporary fix for just about anything when it comes to hiking or camping. Here is another incredibly versatile tool in my backpack. I recommend choosing a color that is bright or reflective just in case you ever need to use it to mark a trail or for other forms of signaling, or to ensure something or someone is visible. Here are some additional uses to consider:
- Repair a rip or tear in a tent or jacket
- Seal bags of opened food
- Make a makeshift strap for your pack
- Fix a water bottle with a small crack
- Help keep a splint in place (only place over their clothes if possible)
- A small bug catcher
- Repair glasses
- Attach something to your backpack
TIP: To avoid carrying that big roll you purchase at the store; I have a little trick I use to re-roll the amount of tape I want to take with me to decrease the size and the weight. I take three toothpicks and tape them together with regular tape to ensure they will stay together and to provide a smooth outer surface. I then unroll a small section of the duct tape and attach it to the toothpicks and start re-rolling the duct tape to it. This creates a "new roll" and I continue to transfer the amount of duct tape I want to the new small roll on the toothpicks. The picture above shows exactly what I am describing with the small roll of highlighter yellow duct tape. You can add as much or as little as you like, but I think you will agree it is much smaller that the large roll.
Wet Wipes & Hand Sanitizer
Wet wipes are something I keep with me basically all the time. Ever since I had children, I seem to have them everywhere. I have them in the backpack I take to work, in my purse, in my car, at my office, and of course when I am hiking. I prefer wet wipes over hand sanitizer because they don't dry out my skin as much, but sometimes hand sanitizer goes the extra mile in making sure we bring home as few germs as possible. I usually put the hand sanitizer in a small Ziplock bag, to make sure it won't spill all over the place if the lid accidentally opens.
TIP: Instead of buying the small packs of 20 wipes, you can also buy the larger tubs, remove the amount you want, and place them in a larger Ziplock bag. I used to do this when my children were younger because most of the time 20 wipes was just not enough to get me through the day. Buying in bulk is also less expensive, and the tighter seal of the Ziplock bag will keep the wipes moist for a longer period of time.
Toilet Paper and/or Tissues
I have boys, so the person who normally needs the toilet paper is me. My children however are routinely in need of a tissue, so I always have tissues with me. These can also be found next to the wet wipes in all of the locations I listed above. When I go on a hike though, I make sure to pack a small amount of toilet paper just in case one of us gets the urge out in the middle of nowhere, because I don't want to exhaust all of my tissues.
TIP: While you can buy the small rolls of toilet paper like the Charmin to Go shown above, there really is no need. As with so many other items, I just pull off measured sections of toilet paper from a normal roll, fold them, and then place them in a Ziplock bag. This way there are pre-measured sections of toilet paper inside the bag, that are easy to retrieve. This also allows you to easily lay the Ziplock bag down on the trail, without getting the rest of the toilet paper dirty, and it eliminates the possibility of the roll getting away from you.
A Rain Jacket
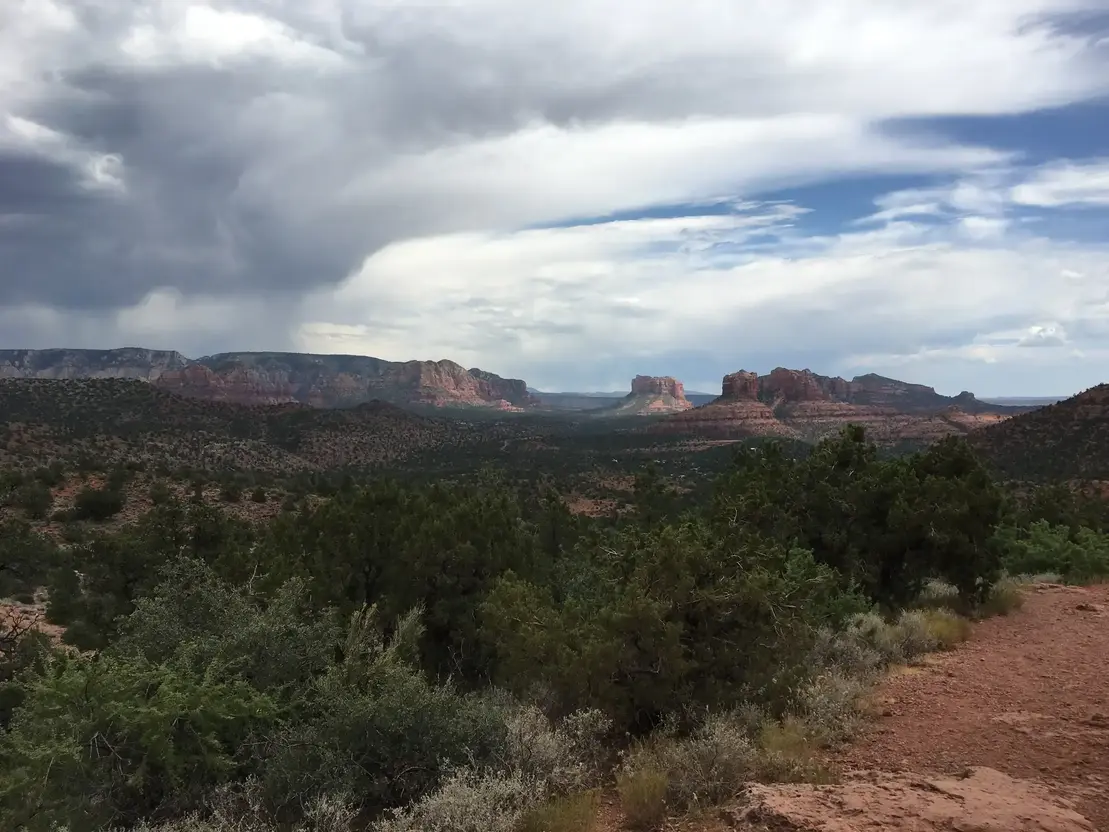
As we all know the weather can sometimes be unpredictable. Clouds can roll in bringing rain and cooler weather at a moment's notice, so having a truly waterproof rain jacket is essential. Keeping your core dry is important to stave off hypothermia.
TIP: Dressing in light layers is important, so you can add or remove layers as needed. Getting a high-quality, packable, lightweight, and completely waterproof rain jacket is a good idea. It should last for years, and when paired with the right layers it also serves as a great outer shell in cold weather.
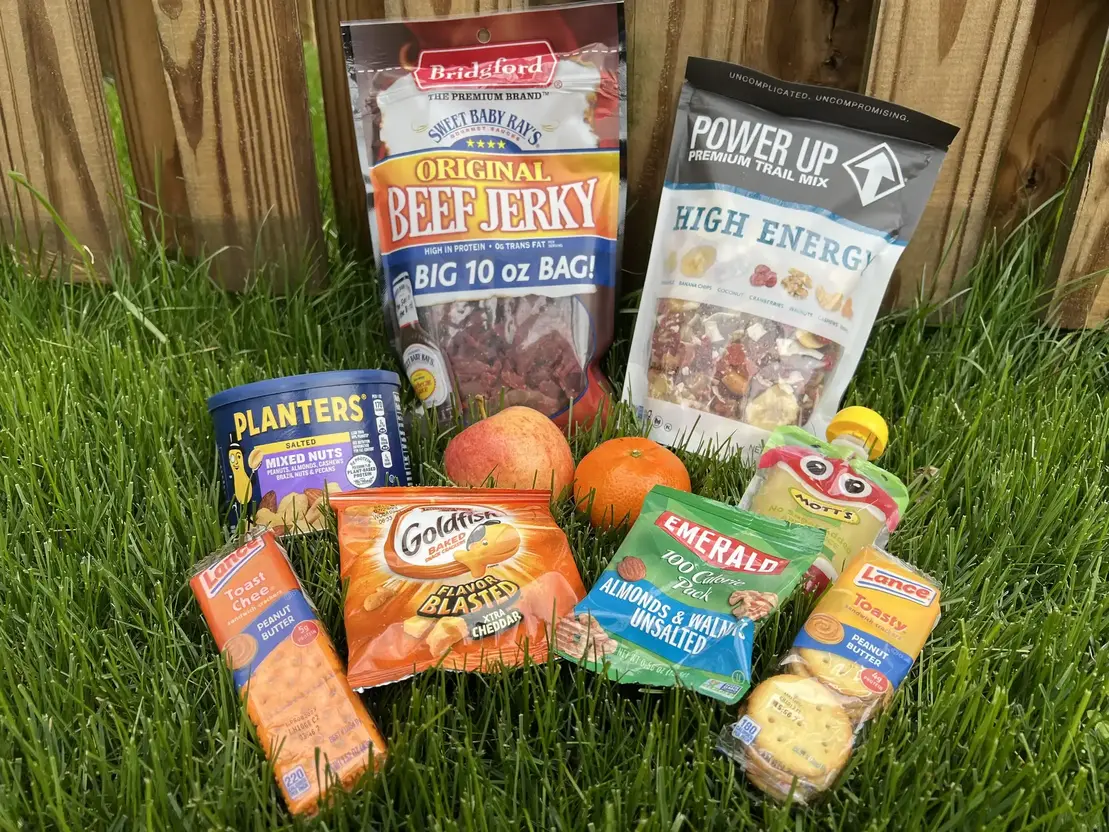
Snacks
Depending on the hike, taking some sort of snacks is always a good idea. If I am hiking with my kids, I consistently take along items like Goldfish, packets of squeezy applesauce, small mandarin oranges, or pretzels. If they start to peter out and begin to complain, taking a break and having some water and a snack usually helps raise their spirits, allowing our hike to get back on track.
When considering snacks to take with you, try to focus on high fat and calorie dense foods that will provide your body with nutrients for energy, but that are also compact and lightweight. For me and my husband, I make sure we pack either some jerky, mixed nuts, or even trail mix, and some fruit. If I have the time, I actually prefer to get creative and make my own trail mix. This way I can add the ingredients that I want for their nutrient values, but with less sugar than what is found in the prepacked mixes.
TIP: Dividing items like trail mix, pretzels, and nuts into smaller Ziplock bags, that can be handed out, is a great way to measure how much everyone has been eaten. It also helps if your party wants to divide into groups and go on different routes. An example would be my oldest wants to take a certain trail with me, while my youngest wants to take a different trail with my husband. This way no one is left without any snacks if needed. It also prevents the hardcore snacker in your group from eating the bulk of the snacks from the one big bag. The Ziplock bags can also double as small trash bags or little pouches, that you or the kids can use to house items you might find along the way. We have carried back many a small rock or shell this way from our hikes. The little bags not only provide a storage mechanism, but they keep items sealed so dirt doesn't get into your pack and on the other items inside.
Hike It In... Hike It Out!
One last thing. If you brought it in with you, take it back out! It is our responsibility to clean up after ourselves and leave the trail the way we found it or even better. We want to conserve the natural beauty for generations to come so others can enjoy them as much as we have. If you see small trash items, like granola bar wrappers, plastic bottles, other such debris that is not biodegradable, please pick them up and take them out with you so they can be properly disposed of. This is something I have been teaching my kids since their first hike. Remember those small Ziplock bags from the snacks you just ate? They are great for storing that trash until it can be disposed of in a trash can.
TIP: I always have small trash bags with me. The two types I always turn to are: the small bags for disposing baby diapers, and the ones for cleaning up after your pet. The ones for diapers are meant to be attached to a baby bag and contain around 20 or so bags rolled up in a convenient container. These are great for attaching to your pack, roll out one at a time, and don't unravel. The same concept is available for picking up pet droppings while on a walk, but the rolls are usually a little larger. You can also buy the small rolls for cleaning up litter boxes, that don't have the handy little case, and place these rolls in another Ziplock bag. As you have probably guessed, I carry quite a few Ziplock bags and have found a multitude of uses for them.
Whether you are new to hiking or experienced, I hope you have found this helpful. Now, get out there, explore the great outdoors, and find what's right for you!